DIY // Paper Circle Wall Art
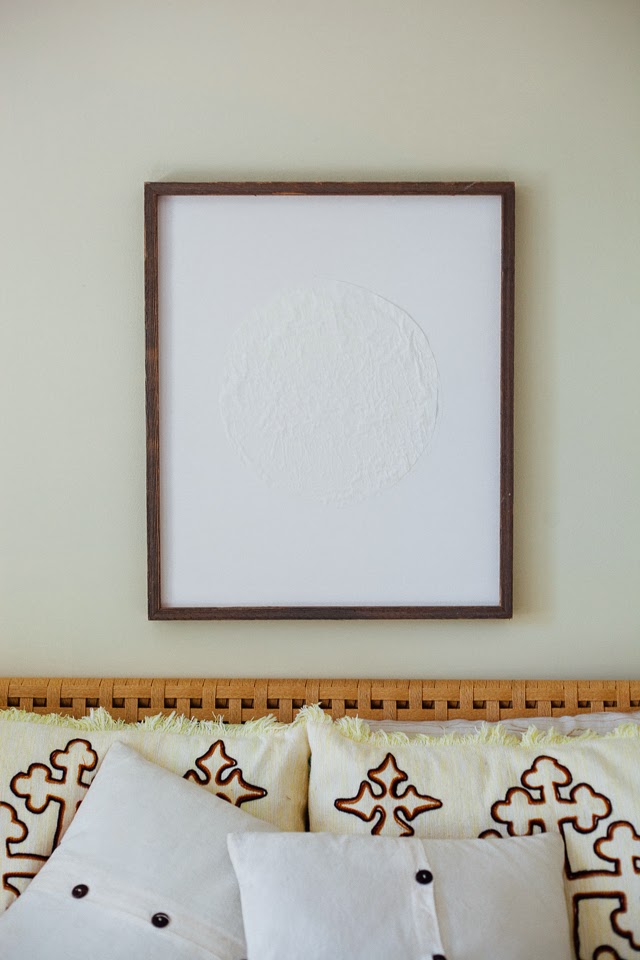
Do you ever find yourself browsing home decor stores for a nice piece of wall art? Do you ever find one that you really like and then realize you could just make it yourself for way cheaper? This is the case with this project here. It's kind of hard to see in the pictures because the texture from the circle in the middle is very subtle making this entire piece very minimal. It's so minimal, in fact, it just looks like a framed canvas...which it is, but a little more special. It's a real bonus if you can find a sweet vintage frame. One of the nice things is that you don't HAVE to use white paper. If you want to get a little wild you could use gray or black or something. I like the white on white because it's just so darn chic. - MF
Supplies:
- one 20"x 24" vintage frame (or not)
- one 20" x 24" white canvas
- 1 sheet of handmade textured white paper ( mine is from paper source)
- mod podge
- paintbrush
- scissors
Directions:
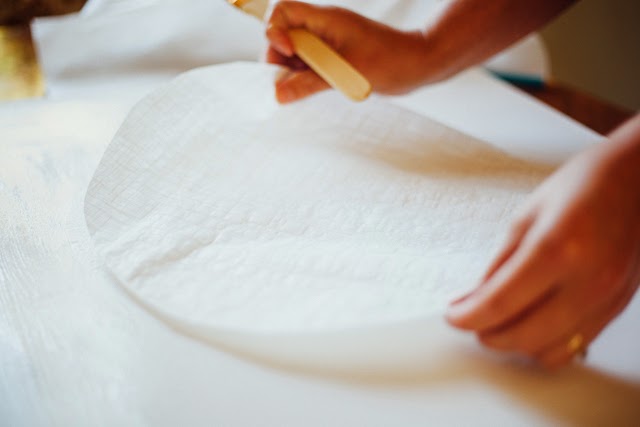
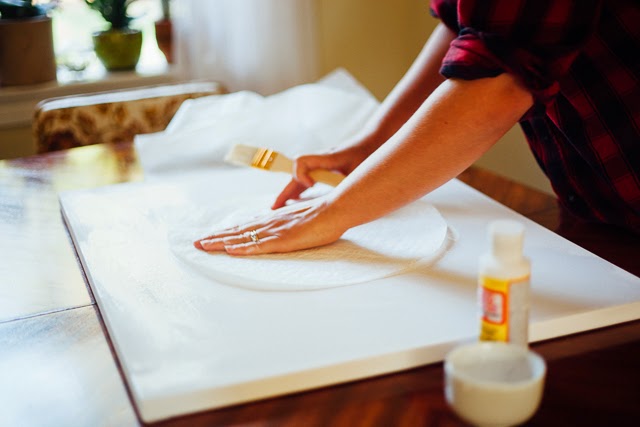
1. Using a dinner plate or any other relatively large, circle object, trace a circle on your handmade paper. The piece of paper I used was quite large so I traced two circles so I could layer them and make the texture pop a bit more. 2. cut the circles out. 3. Glue one circle onto the center of the canvas by way of brushing the mod podge on it. 4. Once you have the first on glued, lightly brush glue on top of it and gently place the second circle on top. Don't press it down completely just so there is more texture. 5. Brush mod podge over the rest of the canvas. 6. Place it in the frame (once it's dry) and hang it on your wall.